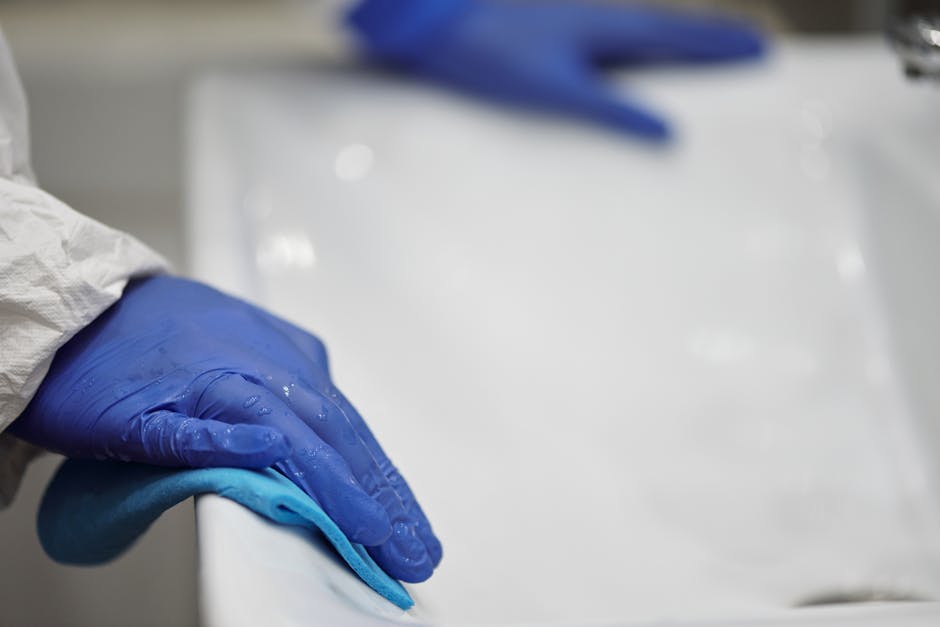
Best methods to restore bathroom grout and prevent future staining
Bathroom grout looks small and harmless until it goes dark, patchy, or stubbornly stained. Then suddenly the whole room feels older, harder to clean, and a bit less fresh than it should. The good news? In many cases, you do not need to rip tiles out or start again. The best methods to restore bathroom grout and prevent future staining are usually a smart mix of deep cleaning, stain removal, sealing, and better daily habits.
That is the real aim here: to help you get grout looking cleaner again and keep it that way. Whether your bathroom is suffering from soap scum, mildew, limescale, or general everyday grime, this guide walks through what works, what does not, and when it is time to call in help. Let's face it, nobody wants to spend a Saturday crouched by the bath doing battle with a toothbrush. But with the right approach, the results can be surprisingly satisfying.
Table of Contents
- Why restoring bathroom grout matters
- How grout restoration works
- Key benefits and practical advantages
- Who this is for and when it makes sense
- Step-by-step guidance
- Expert tips for better results
- Common mistakes to avoid
- Tools, resources and recommendations
- Law, compliance, standards, or best practice
- Options and comparison table
- Case study or real-world example
- Practical checklist
- Conclusion
- Frequently asked questions
Why Best methods to restore bathroom grout and prevent future staining Matters
Grout is porous. That means it naturally absorbs moisture, soap residue, body oils, and airborne grime if it is not protected properly. In a bathroom, where steam, splashes, and standing damp are part of daily life, grout can stain faster than people expect. Once it darkens, the tiles may still be fine, but the room can look tired and neglected.
Restoring grout matters for three very practical reasons. First, it improves appearance immediately. Clean grout makes tiles look brighter and the whole room feel more hygienic. Second, it helps you spot maintenance issues earlier, like failing sealant, hidden mould, or leaks around shower edges. Third, it can extend the life of the tiled area by reducing the chance of moisture sitting where it should not.
In our experience, people often assume discoloured grout is permanent. Sometimes it is. Often it is not. A surprising amount of bathroom grout staining is a mix of surface dirt and mineral build-up, which can be removed with the right method and a bit of patience. The trick is knowing what type of stain you are dealing with before you attack it with the nearest bottle under the sink.
Expert summary: The most effective grout restoration approach is usually: deep clean, treat the cause of staining, dry thoroughly, seal the grout, then maintain it with light routine cleaning. Miss one of those steps and the problem tends to return.
How Best methods to restore bathroom grout and prevent future staining Works
Think of grout restoration as a process rather than a single product. You are not just "cleaning the line between tiles". You are removing surface contamination, lifting embedded marks, checking whether the grout itself has degraded, and creating a protective barrier so the same dirt does not settle back in.
Most bathroom grout problems fall into a few categories:
- Soap scum: a grey-white film caused by soap and hard-water residue.
- Limescale: chalky mineral deposits, especially near showers and taps.
- Mould or mildew: dark spotting caused by persistent damp and poor airflow.
- General grime: a build-up of body oils, dirt, and cleaning residue.
- Old sealant failure: when grout was once protected but the barrier has worn away.
The practical method depends on the stain type. For example, limescale responds differently to cleaning than mould does. If you use the wrong cleaner, you may waste time or, worse, damage the grout or surrounding sealant. That is why the best bathroom grout cleaning methods start with diagnosis, not scrubbing.
After cleaning, sealing is what prevents staining from coming back so quickly. Sealant does not make grout invincible, but it slows absorption. You will still need to wipe down the area and keep moisture under control. That part sounds boring, yes, but it genuinely makes the difference between a grout line that stays fresh and one that starts looking grubby again by next month.
Key Benefits and Practical Advantages
Restoring grout is one of those jobs where the visual payoff is immediate. But the benefits go beyond appearance.
- A fresher-looking bathroom: clean grout instantly makes tiles look newer and brighter.
- Better hygiene perception: even if the room is clean, stained grout can make it feel less sanitary.
- Improved moisture control: clean, sealed grout is less likely to absorb damp and grime.
- Longer-lasting tiled surfaces: protecting grout helps reduce deterioration over time.
- Lower maintenance effort: a sealed surface is easier to wipe and keep clean.
- Better end-of-tenancy presentation: if you are moving out, grout condition can influence the overall impression of the bathroom.
There is also a quieter benefit people overlook: restoring grout can make you more likely to keep up with routine cleaning. When the room already looks better, you naturally treat it better. Strange but true. A cleaner bathroom tends to stay cleaner because it feels worth the effort.
If your bathroom cleaning routine is part of a broader home care schedule, this can sit neatly alongside services such as deep cleaning or regular domestic cleaning, especially if you want to maintain the whole room rather than tackle the grout in isolation.
Who This Is For and When It Makes Sense
This topic matters to more people than you might think. Bathroom grout restoration is useful for homeowners, landlords, tenants, letting agents, holiday let hosts, and anyone trying to keep a bathroom looking respectable without spending a fortune on retiling.
It makes sense to focus on grout restoration if:
- the grout is stained but still intact;
- the bathroom looks dull even after regular cleaning;
- you notice dark lines around the shower or bath;
- there is mildew returning in the same places;
- you are preparing a property for sale, inspection, or end-of-tenancy checks;
- the tile surfaces are fine, but the grout makes them look much older than they are.
It may be less suitable if the grout is crumbling, missing in sections, or visibly separating from the tiles. In that case, restoration may mean removing and re-grouting rather than cleaning. That is one of those unglamorous truths. Sometimes the best clean in the world cannot fix a material that is already failing.
For landlords or tenants, grout condition can become part of a wider cleaning standard. If the bathroom needs more than a quick tidy, a one-off reset through one-off cleaning can be a sensible starting point before you decide whether the grout itself needs specialist treatment.
Step-by-Step Guidance
If you want the safest and most effective approach, start simple and work methodically. This is the bit where people sometimes rush, and then wonder why the stain is still there two hours later.
1. Identify the stain type
Look closely at the grout. Is it grey and greasy-looking, chalky, brown, green, or black? A chalky build-up usually points to limescale. Green or black spots often suggest mould or mildew. General dullness is usually grime and soap residue. Knowing the difference matters because you do not want to scrub a mineral stain with a mould treatment and call it a day.
2. Clear the area and ventilate
Open windows if you can. Run the extractor fan. Remove bottles, mats, and anything sitting along the edges of the bath or shower. The bathroom needs a bit of breathing space before cleaning starts. Dry air helps cleaners work better and makes later sealing more reliable.
3. Pre-clean the surface
Wipe away loose dirt with warm water and a soft cloth or sponge. This stops you from grinding grit into the grout while scrubbing. It is not a dramatic step, but it makes the rest of the job easier.
4. Apply the right cleaning method
Use a grout-safe cleaner suited to the stain type. Work in small sections. Let the product sit for the recommended time, then scrub with a firm brush. An old toothbrush can work on narrow lines, but a purpose-made grout brush is usually quicker and less fiddly. Avoid over-wetting the area. Too much water just spreads the mess around.
5. Rinse and dry thoroughly
Once the stain lifts, rinse carefully so no cleaner residue remains. Then dry the area with a clean cloth. If the room stays damp, stain-causing residue and mould can return faster than you would like. A dry finish is not cosmetic; it is part of the prevention.
6. Check for remaining shadowing
Some grout keeps a faint shadow even after cleaning. If the stain is still visible, repeat the process once rather than scrubbing aggressively for ages. There is a point where force becomes counterproductive. You can hear the brush squeak, the grout wince, and that is usually your cue to stop.
7. Seal the grout
When the grout is fully dry, apply a suitable grout sealer if the type of grout allows it. This step helps repel moisture and grime. Be patient here. Sealing damp grout is one of the easiest ways to create future problems. A proper dry-down matters more than most people realise.
8. Build in a simple maintenance routine
Wipe shower walls or splash zones after use where practical, keep the room ventilated, and clean little and often. A minute here and there beats a marathon scrub at the weekend. Every time.
Expert Tips for Better Results
A few practical habits make a big difference. These are the things that separate a decent result from a proper, long-lasting one.
- Work from clean to dirty. Start at the top or the least soiled areas and move into the heavy staining later.
- Do not use abrasive scouring pads on coloured grout. They can scratch the surface or strip away pigment.
- Test any cleaner first. Even "gentle" products can affect surrounding sealant or natural stone tiles.
- Do not mix products. That should go without saying, but bathrooms are full of half-used bottles and questionable optimism.
- Focus on airflow. Ventilation is one of the simplest ways to prevent repeat staining.
- Replace tired sealant around edges. Grout and sealant work together. If one is failing, stains often follow.
- Use microfiber for drying. It is better at lifting residue than a rough towel and leaves fewer streaks.
If you are dealing with a bathroom that has a larger build-up of grime elsewhere, a broader service such as deep cleaning can help reset the whole space, while targeted floor treatment through hard floor cleaning can support the surrounding surfaces too.
Small habit, big effect: after a shower, give the tiles and grout a quick wipe if the bathroom often gets steamy. It sounds tedious. It is tedious. But it really helps.
Common Mistakes to Avoid
Most grout problems get worse because of well-meant mistakes. To be fair, bathroom cleaning advice online can be a bit of a mess. Here is what to avoid.
- Using bleach as the first and only solution: bleach can lighten some stains but does not fix mineral build-up and may not solve the root cause of mould growth.
- Scrubbing too hard: aggressive brushing can damage grout edges and make the line rougher, which attracts more dirt later.
- Skipping drying time before sealing: sealed damp grout can trap moisture inside.
- Ignoring the source of damp: if poor ventilation or a leak is feeding the staining, the same marks will return.
- Cleaning only the visible lines: edge sealant, corners, and shower thresholds often matter just as much.
- Using acidic cleaners on sensitive surfaces: some tiles and finishes do not like strong acids, especially if natural stone is involved nearby.
A common one is assuming that if a product fizzes, it must be working properly. Not always. Sometimes it is just reacting with soap residue while the real stain sits there, unimpressed.
Another mistake is stopping at "looks better". The grout may look improved after cleaning, but if you do not seal it or improve ventilation, the stain cycle usually comes back. And then you are back on your knees again, which nobody wants.
Tools, Resources and Recommendations
You do not need a van full of specialist kit to restore bathroom grout. But the right tools help a lot, and they reduce the chance of damaging the surface.
| Tool or material | Best use | Notes |
|---|---|---|
| Grout brush | Scrubbing grout lines | Better control than a large sponge or cloth |
| Microfiber cloths | Drying and residue removal | Useful for finishing and repeat wiping |
| Soft sponge | Pre-cleaning tiles | Helps remove loose surface dirt first |
| Grout-safe cleaner | Removing grime and staining | Choose based on stain type and tile material |
| Grout sealer | Protection after cleaning | Only apply when grout is fully dry |
| Extraction or ventilation | Drying the bathroom | Open windows or use the extractor fan where available |
For ongoing care, it helps to think beyond the grout itself. Bathrooms often collect residue on mirrors, windows, floors, and nearby fittings, so a wider clean can support the result. If glass and frames need attention too, window cleaning can improve light and reduce the sense of heaviness in the room.
And if the stains are part of a bigger picture after renovation dust, plaster specks, or renovation traffic, after builders cleaning may be the better reset. That is often overlooked, but it can save a lot of repeat effort.
Law, Compliance, Standards, or Best Practice
For most households, grout restoration is straightforward and does not involve formal regulation. That said, there are still sensible standards to follow, especially in shared homes, rental properties, or commercial settings where cleaning products and slip risks matter.
In the UK, best practice is to use cleaning chemicals according to the manufacturer's instructions, keep the area well ventilated, and store products safely away from children and pets. If you are using stronger detergents or specialist products, always check compatibility with the tile and grout type first. This is particularly important where natural stone, matt finishes, or older bathroom fittings are involved.
For landlords, letting agents, and property managers, grout condition can become part of broader expectations around cleanliness and presentation. End-of-tenancy checks often look at whether a bathroom is hygienic, free from mould, and reasonably maintained rather than simply "surface clean". In that context, restoring grout can make a visible difference. A bathroom that smells clean, dries properly, and looks cared for tends to support a better inspection outcome.
If work is being done in a larger property setting, make sure anyone handling chemicals or wet surfaces follows safe working practices. That is part of a broader approach reflected in services such as health and safety policy and insurance and safety, which matters when jobs involve slip hazards, strong cleaning products, or repeated use of water.
Options, Methods, or Comparison Table
Different grout issues call for different responses. The table below gives a quick comparison of the most common approaches.
| Method | Best for | Pros | Limitations |
|---|---|---|---|
| Manual scrub cleaning | Light to moderate grime | Low cost, simple, good for regular upkeep | Can be slow on stubborn stains |
| Targeted stain treatment | Mould, limescale, soap scum | More effective when matched to the stain type | Requires correct product choice |
| Grout sealing | Preventing future staining | Helps repel moisture and dirt | Needs clean, dry grout first |
| Re-grouting | Missing, crumbling, or deeply damaged grout | Restores structure and appearance | More labour-intensive |
| Professional deep clean | Widespread staining or repeated build-up | Efficient, thorough, better for large jobs | Usually costs more than doing it yourself |
For a small shower area, a careful manual clean and seal may be enough. For a family bathroom that gets heavy daily use, or a property that needs to look spotlessly presentable, a deeper reset can save time and frustration. In some cases, pairing grout work with oven cleaning or other focused household tasks is a practical way to deal with the whole "spring reset" feeling rather than ticking off one annoying job at a time.
Case Study or Real-World Example
Here is a realistic example. A busy household notices that the shower grout along the lower tiles has gone dull grey, especially near the sealant lines. The tiles themselves are fine, but the room looks tired by the end of each week. The family has been wiping the shower down occasionally, but the bathroom is often left steamy after evening use, and the window tends to stay shut in colder weather.
Rather than replacing the grout, the process starts with a targeted clean. First, the area is vented and dried as much as possible. Next, the stained lines are cleaned in small sections, with extra attention on the lower corners where water sits longest. After rinsing and drying, the grout is left overnight to make sure no moisture remains trapped in the lines. The next day, a suitable sealer is applied.
The big difference is not only appearance. The bathroom becomes easier to maintain. Instead of weekly heavy scrubbing, the family shifts to a lighter routine: a quick wipe-down after showers, better extractor fan use, and a proper deep clean every so often. The grout does not stay perfect forever, of course. But it stops being a constant problem.
That is usually the real win. Not perfection. Just control.
In homes where the bathroom is part of a more general cleaning schedule, the result can sit neatly alongside other tasks handled by domestic cleaning or a planned one-off clean when everything has got a bit beyond the usual weekly tidy.
Practical Checklist
Use this checklist before, during, and after restoring bathroom grout.
- Identify whether the stain looks like grime, limescale, mould, or mixed residue.
- Clear shelves, mats, bottles, and anything that blocks access.
- Open windows or turn on the extractor fan.
- Pre-clean the area with warm water and a soft cloth.
- Use a cleaner suitable for the stain and the tile material.
- Scrub gently in sections, not all at once.
- Rinse thoroughly to remove leftover product.
- Dry the area completely before sealing.
- Apply grout sealer where appropriate.
- Improve ventilation and wipe down wet surfaces regularly.
- Watch for recurring stains near corners, taps, and shower edges.
- Reassess if the grout is crumbling or separating.
If you can tick most of those off, you are on the right track. If not, the stains will probably keep coming back, and that is the honest truth.
Conclusion
The best methods to restore bathroom grout and prevent future staining are rarely dramatic. They are usually careful, practical, and repeatable: identify the stain, clean it properly, dry the area well, seal the grout, and then protect it through better daily habits. That combination does more than make the bathroom look nicer. It helps the room stay cleaner, longer.
If your grout is stained but structurally sound, restoration is often the smartest first move. If it is damaged or failing, cleaning alone will not solve the problem, and re-grouting may be the more sensible option. Either way, the key is to act early rather than wait until every line looks permanently marked.
Get a free quote today and see how much you can save.
And if you only take one thing from this guide, let it be this: a little prevention after the clean is what keeps the bathroom feeling fresh on a grey Tuesday morning, not just on the day you scrubbed it.
Frequently Asked Questions
What is the best way to clean bathroom grout without damaging it?
The safest approach is to use a grout-safe cleaner, apply it in small sections, and scrub with a firm but not abrasive brush. Avoid harsh scouring pads and do not over-wet the grout. If the stain type is unknown, test a small area first.
Can stained grout be restored without replacing it?
Often, yes. Surface staining from soap scum, limescale, or grime can usually be improved with proper cleaning and drying. If the grout is cracked, missing, or crumbling, then cleaning will only do so much and re-grouting may be needed.
How do you stop bathroom grout from staining again?
Seal the grout once it is fully clean and dry, keep the room ventilated, and wipe away standing moisture after showers where practical. Regular light cleaning is much better than waiting until the grout looks visibly dirty again.
Does grout sealer really work?
Yes, but within limits. Sealer helps slow moisture and dirt absorption, which makes grout easier to maintain. It does not make grout stain-proof, so routine cleaning and ventilation still matter.
How often should bathroom grout be sealed?
That depends on the sealer, the grout type, and how heavily the bathroom is used. In general, if water no longer beads or the grout starts to darken quickly after cleaning, it may be time to reapply. Always follow the product guidance.
Why does grout in showers stain faster than elsewhere?
Showers stay damp for longer, which encourages mineral build-up, soap residue, and sometimes mildew. Corners and lower lines also take more splash and less airflow, so they tend to stain first.
Is bleach safe for bathroom grout?
Sometimes it can help with surface discolouration, but it is not a universal fix. It may not remove limescale and can affect nearby materials if used carelessly. It is better to match the cleaner to the stain rather than rely on bleach alone.
What if the grout still looks dark after cleaning?
There may be deep staining, shadowing, or actual wear in the grout itself. Try one more careful treatment, but if the line remains dark or uneven, the grout may need sealing, recolouring, or replacement.
Can I restore coloured grout the same way as white grout?
Yes, but you need to be more careful. Harsh cleaners and abrasive brushing can fade coloured grout or create patchiness. Test first and use gentler methods where possible.
How long does grout need to dry before sealing?
Drying time depends on room conditions, ventilation, and how much water was used during cleaning. It needs to be completely dry, not just surface dry. If in doubt, leave it longer rather than rushing the sealant step.
When should I get professional help for bathroom grout?
It makes sense to get help if the staining keeps returning, the grout is heavily blackened, the room has persistent damp, or the job is simply too large to tackle comfortably. A deeper clean can be a lot easier than trying three products and a stiff brush on your own.
Can better cleaning elsewhere in the house help keep bathroom grout cleaner?
Indirectly, yes. A cleaner home generally means less dust, less residue, and less general grime carried into the bathroom. Services like carpet cleaning, upholstery cleaning, or rug cleaning can reduce the amount of dirt circulating through a property, which helps everything feel fresher.